How to Use MassiliaVH
Welcome to Massilia-Virtual Histology platform. This online tool is designed to transform raw Stimulated Raman Scattering (SRS) data into Stimulated Raman Histology (SRH) images, providing a digital alternative to conventional Hematoxylin & Eosin (H&E) staining. The platform works with data acquired from any type of SRS microscope, as long as your dataset includes at least the CH₂ (∼2850 cm⁻¹) and CH₃ (∼2930 cm⁻¹) vibrational contrast channels.
1Sign Up
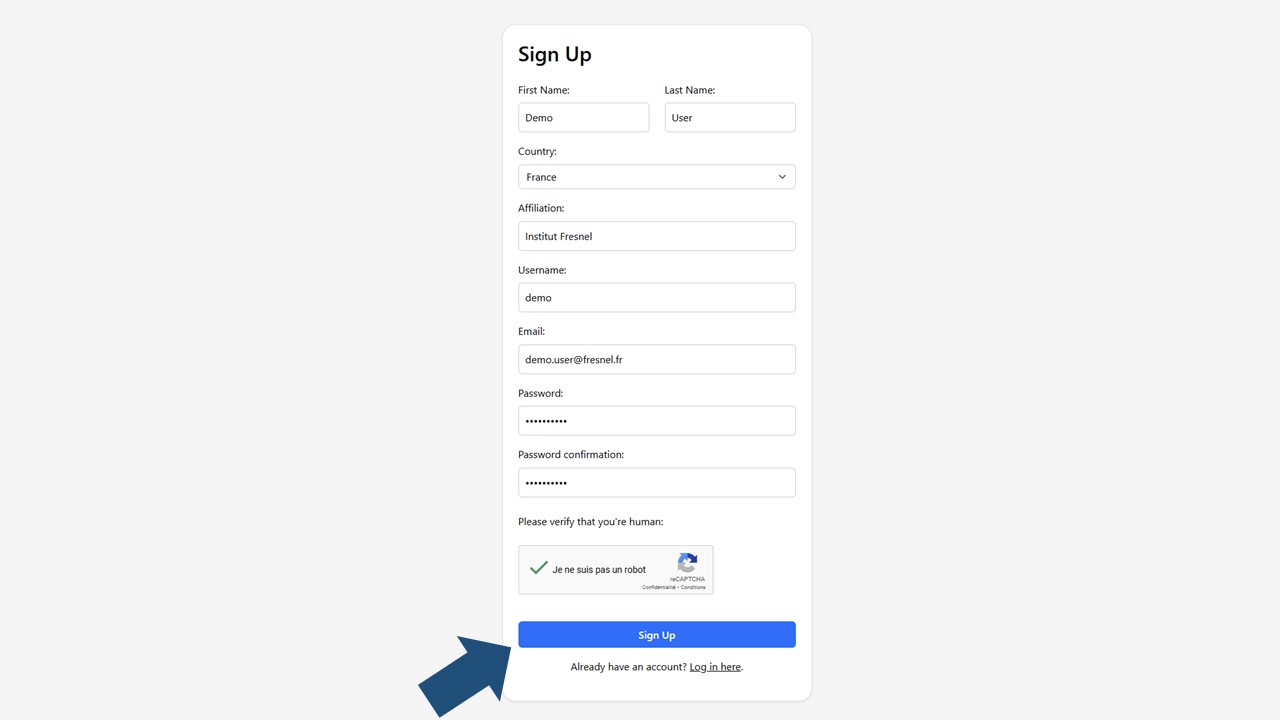
Go to massiliavh.fresnel.fr and click the Sign up here button.
Enter the required details
- Name (your full name or lab name)
- Country (your country of affiliation
- Affiliation (your lab)
- Username
- Email address (preferably your institutional email)
- Password (at least 8 characters, including one number and one special character)
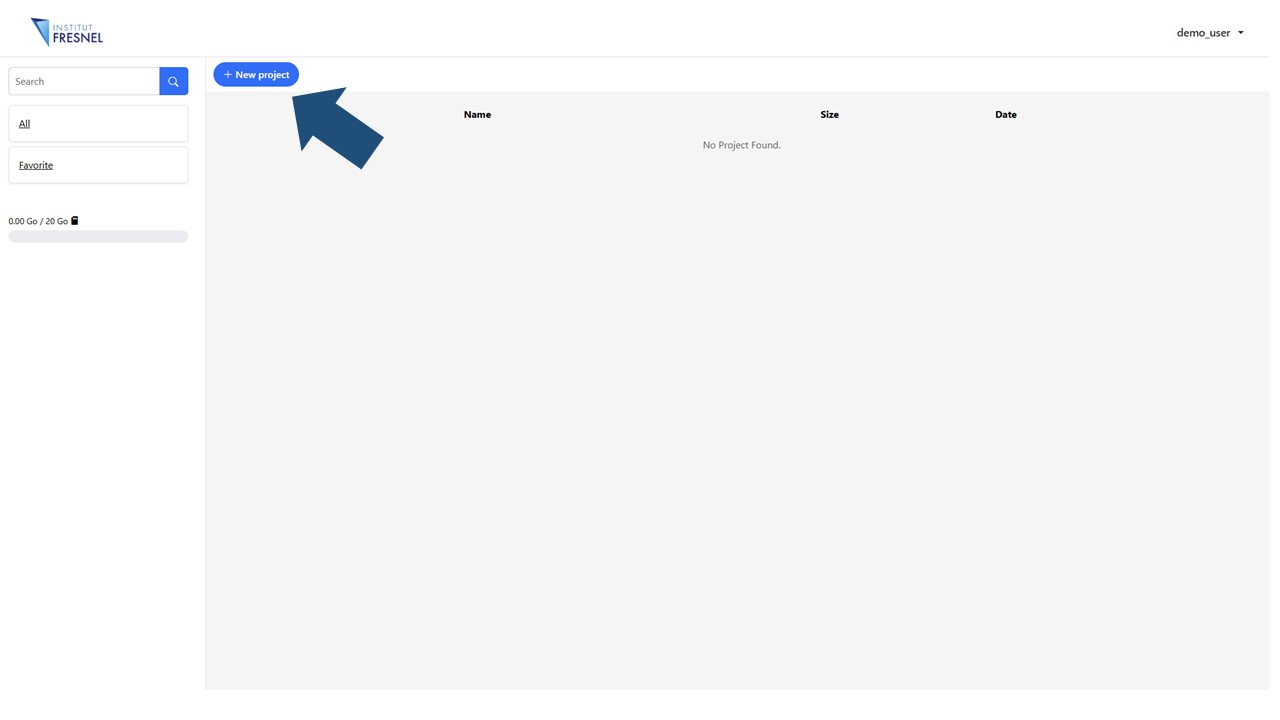
2Create your first project
The main dashboard will display (once the first one created) a list of your projects that you can access, edit, duplicate or erase anytime. It is possible to create an unlimited number of projects but the total assigned disk space for all your projects is 20 Gb
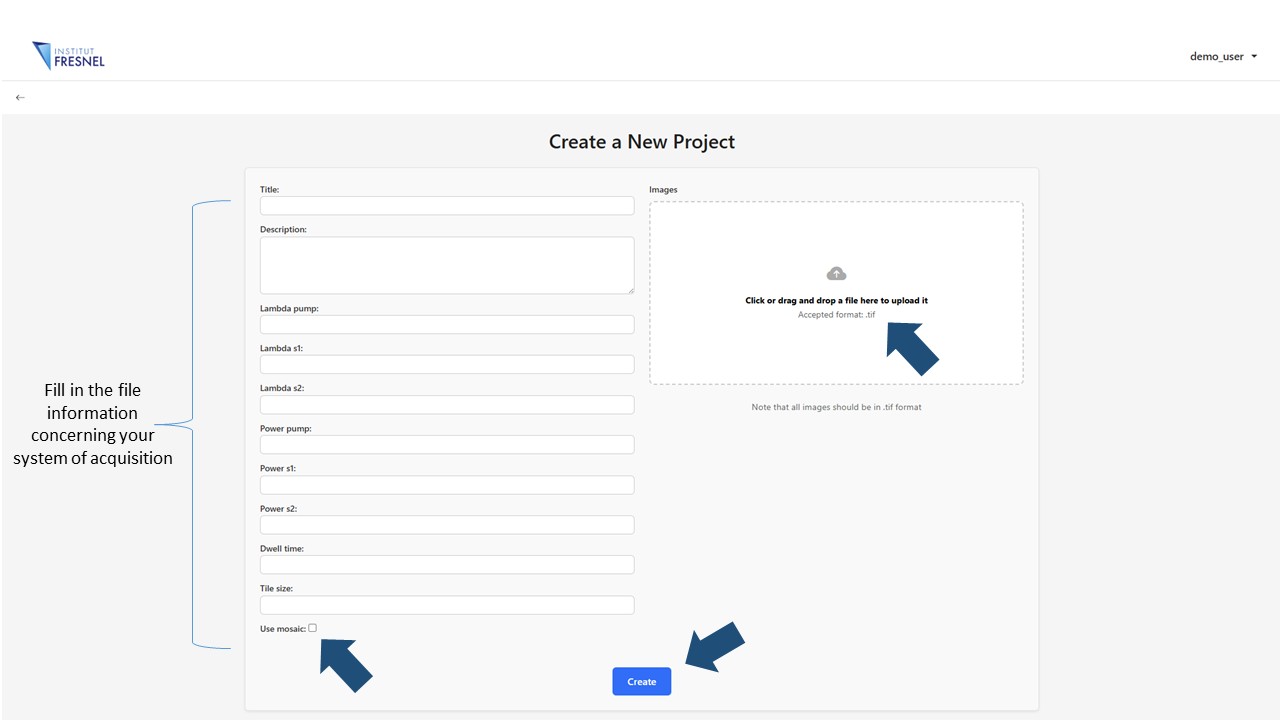
To create the tutorial project we will use the following tif file containing a stack of CH2 and CH3 images of a human Meningioma. Download the file and use it to create a new project.
Drag the file to the uploading button, fill in all the information concerning the acquisition conditions and click the Create button. If multiple files are going to be used, they can be uploaded together If the files are part of a mosaic and need to be assembled, check the Use Mosaic button and specify the dimensions of the mosaic. In this case all the files needs to be enumerated
3Explore and edit your raw file
Once the project created you will be redirected to it's page. Here, raw images are displayed as contrast enhanced images
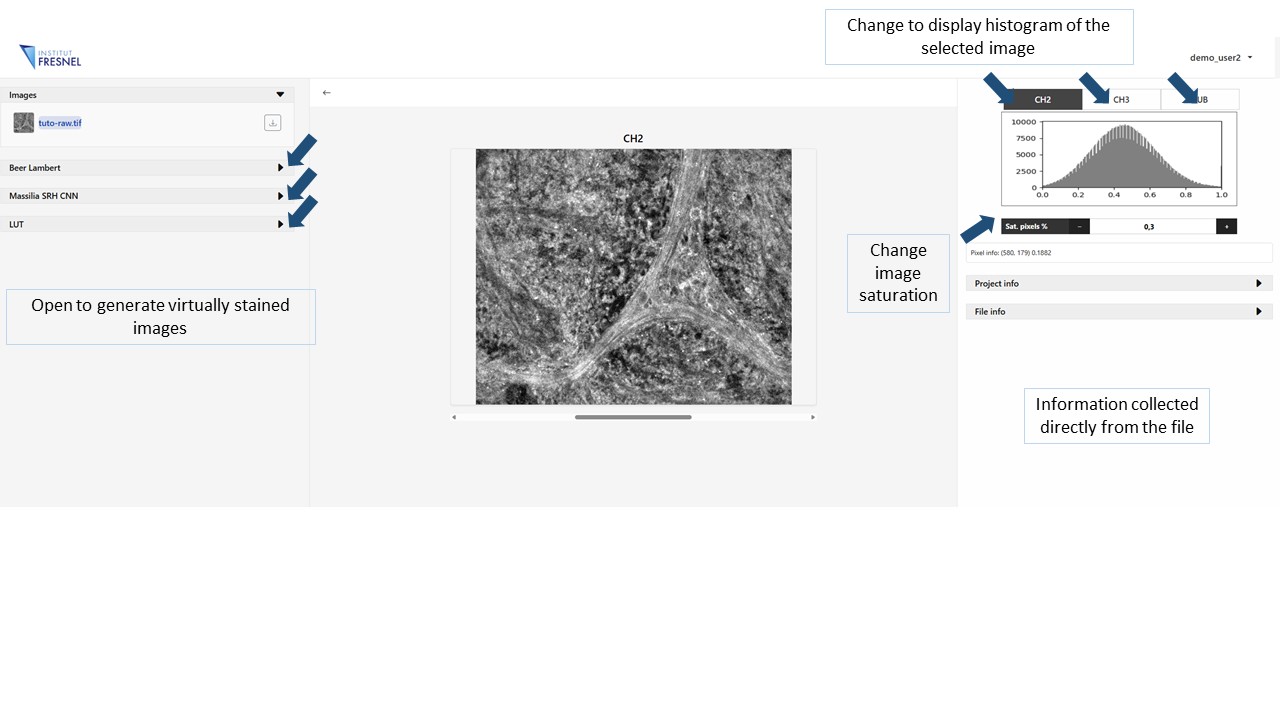
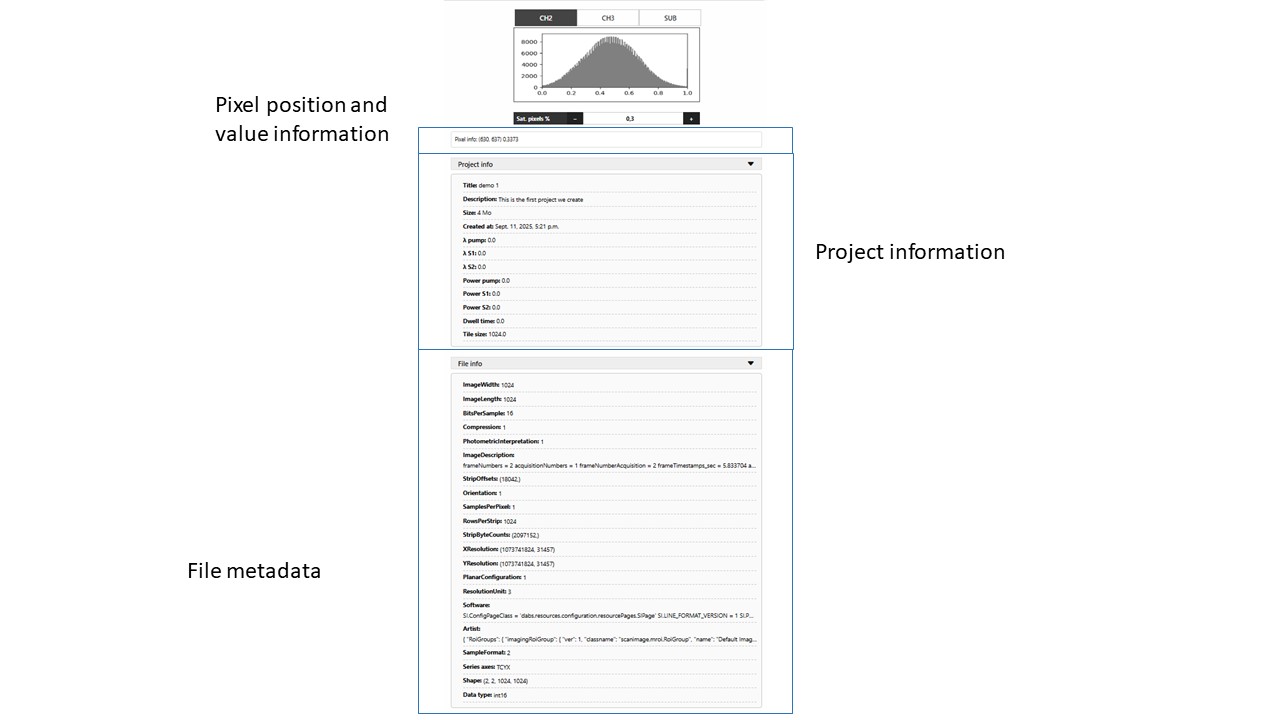
In order to modify the contrast of each individual raw image select the channel of ineterest in the top right panel and modify the parameter Sat. pixels, this parameter can take values from 0 to 100 and represents the fraction of pixels at the very dark and very bright ends of the histogram that are allowed to be clipped (saturated) when stretching the intensity range.
On the right panel file information can be found. Project info will display the information filled during the creation of the project. On the other hand, File info will display the information collected automatically from the file using metadata tags
4Generate Beer Lambert virtual staining
Click on the Beer lambert panel to generate the virtually stained image. Modify the parameters CH3 factor and Nuclei factor to change the contribution of each independent channel to the stain. Modify k to change the final image intensity. In this exemple CH3 factor = 0.9 , Nuclei factor = 1.1 and k = 1
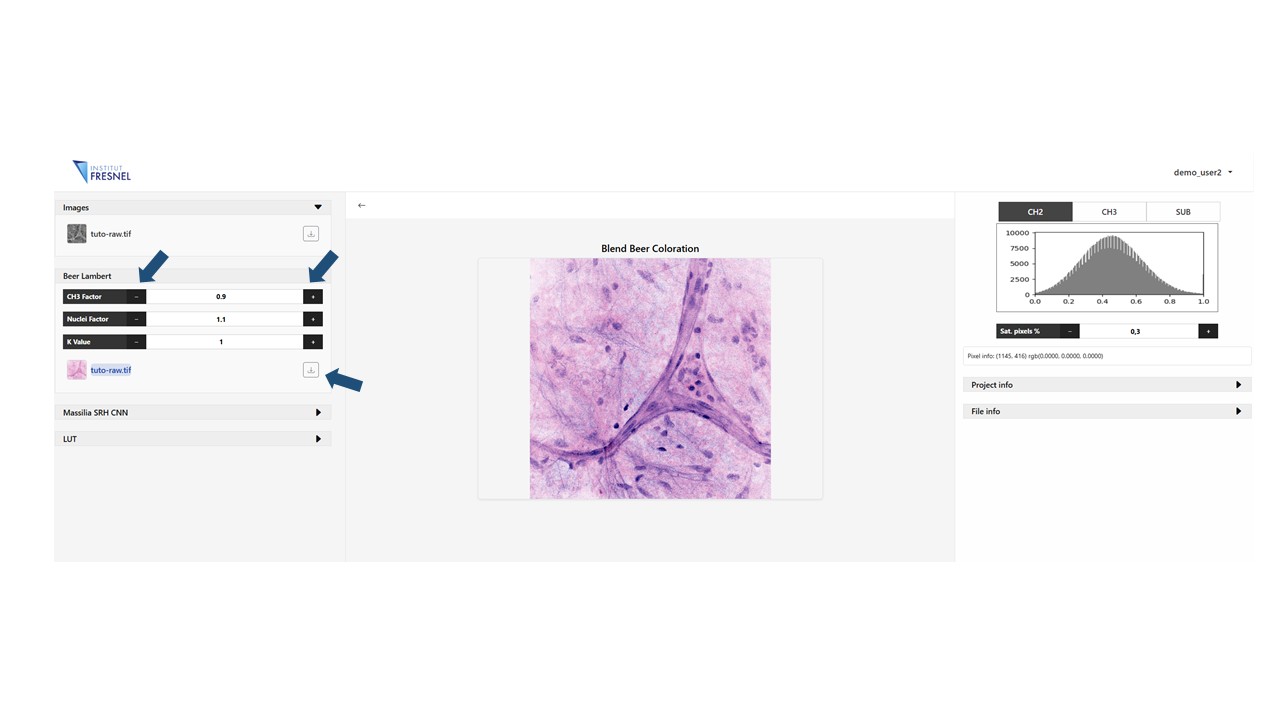
Finally you can always download the resulting image by clicking on the download arrow near the image on the list
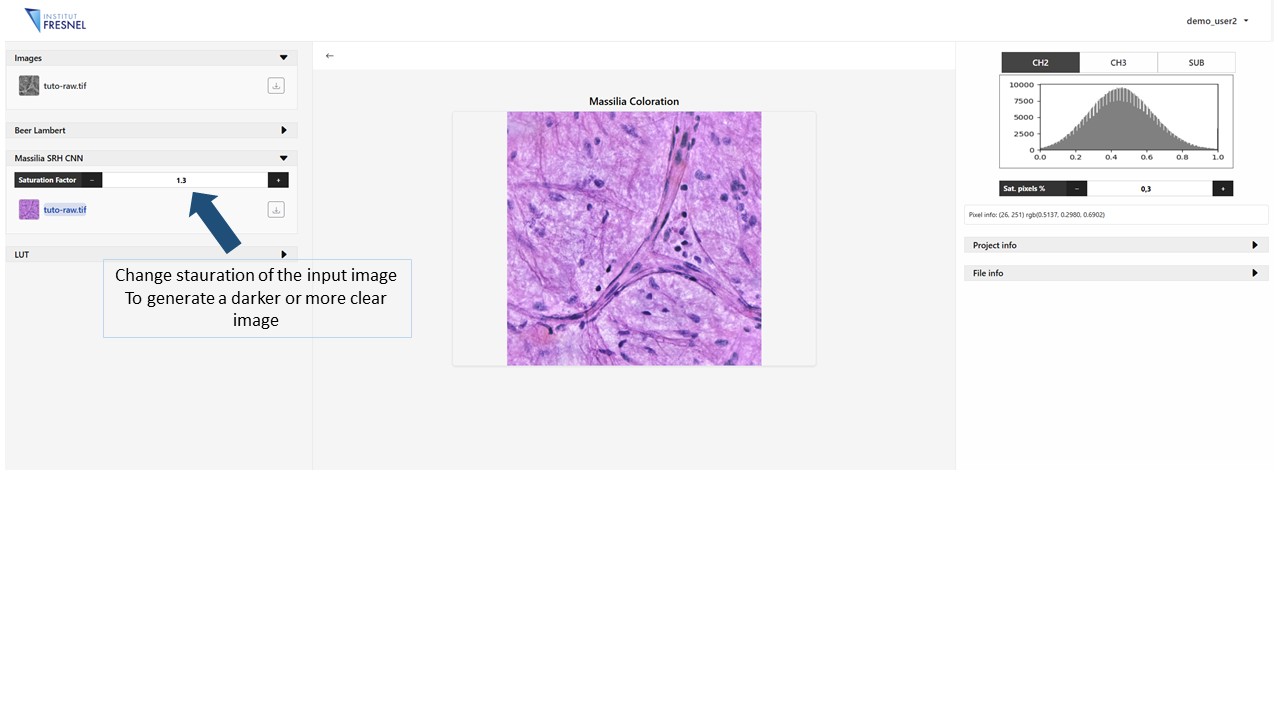
5Generate Massilia virtual staining
Click on the Massilia panel to generate the virtually stained image. Modify the parameters Saturation factor to change the saturation of the input image, a more clear image will correspond to a higher value
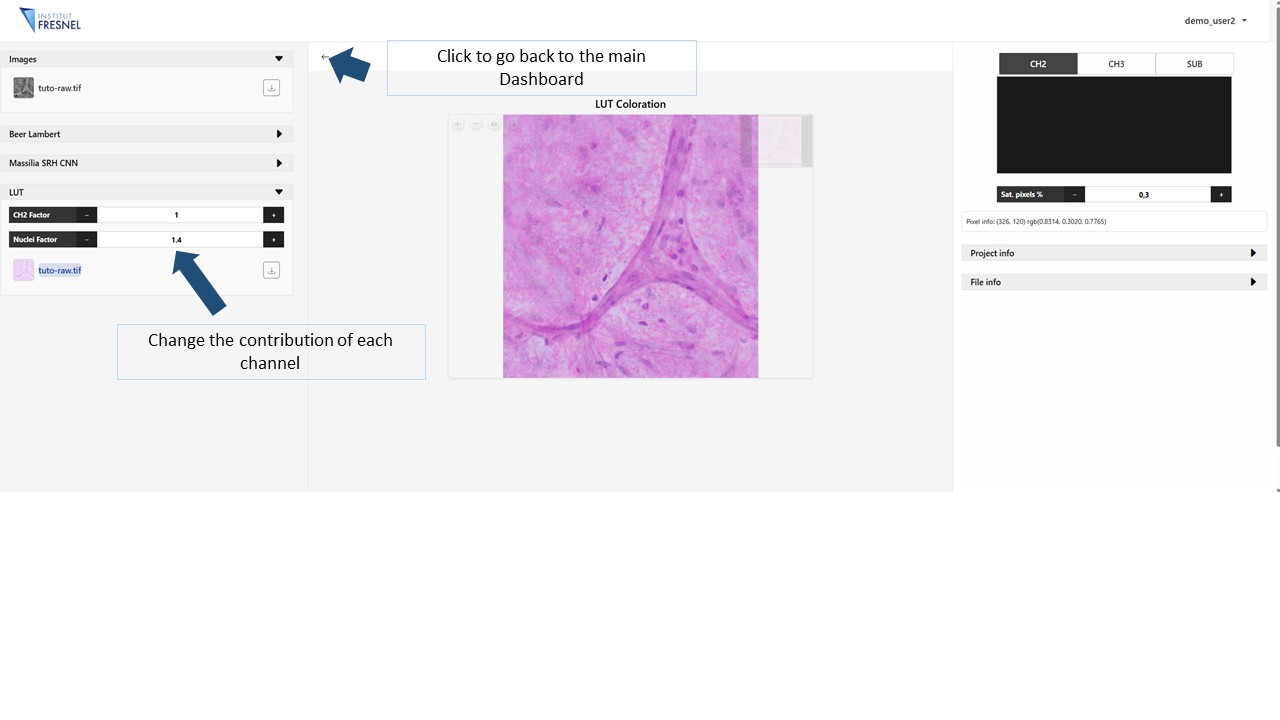
5Generate LUT virtual staining
Click on the LUT panel to generate the virtually stained image. Modify the parameters CH3 factor and Nuclei factor to change the contribution of each independent channel to the stain.
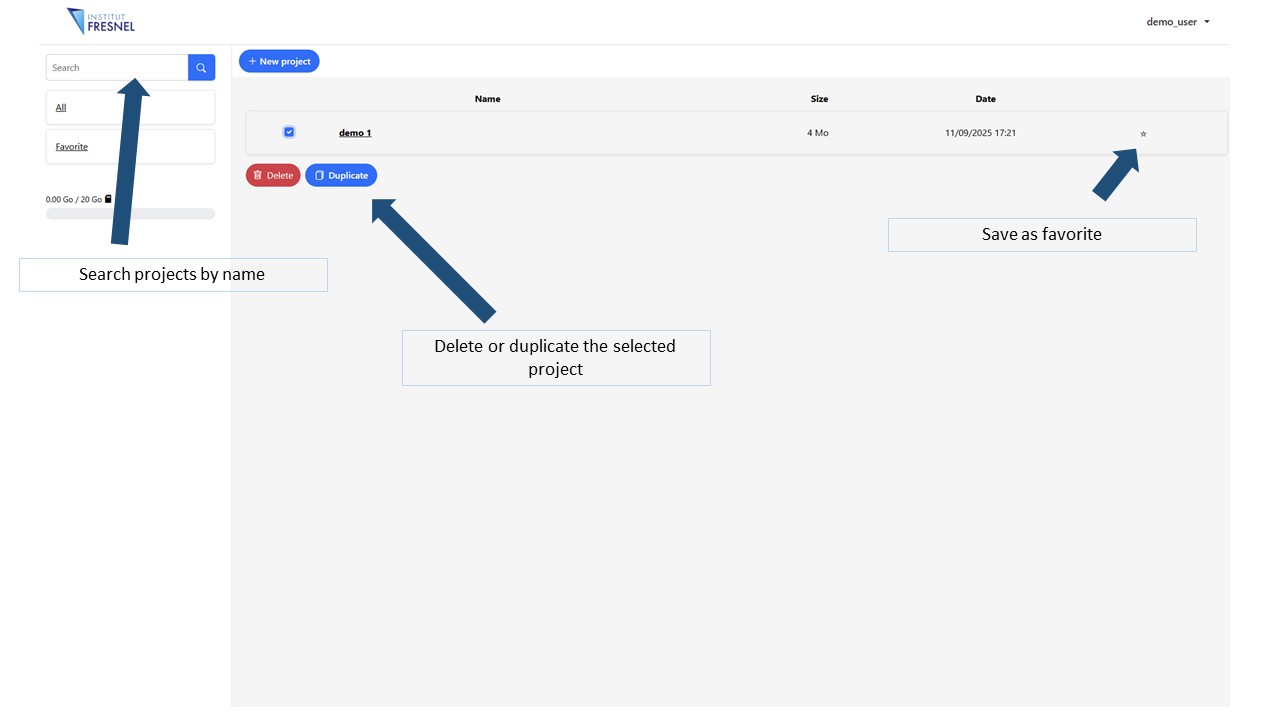
6Main dashboard
Here is where all the projects are displayed. You can access anytime, edit , duplicate or delete them